- 公開日:
Google Meetの会議の作り方(始め方)
この記事では、Google Meetの会議の作り方について説明します。
会議の作り方については、PCの場合とスマホ(iPhone)の場合に分けて説明しています。
PCでの会議の作り方は、ブラウザでもアプリでも同じですので、その点はご留意ください。
Google Meetの会議の作り方
Google Meetでの会議の作り方については、PCの場合とスマホ(iPhone)に分けて説明しています。
PCのブラウザ(Google Chrome)でGoogle Meetの会議を作成する場合は、Google Meetにアクセスしてください。
PCの場合
PCの場合、ブラウザもしくはアプリから会議を作成することができます。下記では、ブラウザでGoogle Meetの会議を作る方法について解説します。なお、Google Meetアプリをご利用の場合は、アプリを起動した後の手順は全く同じですので、以下の手順をご参照ください。
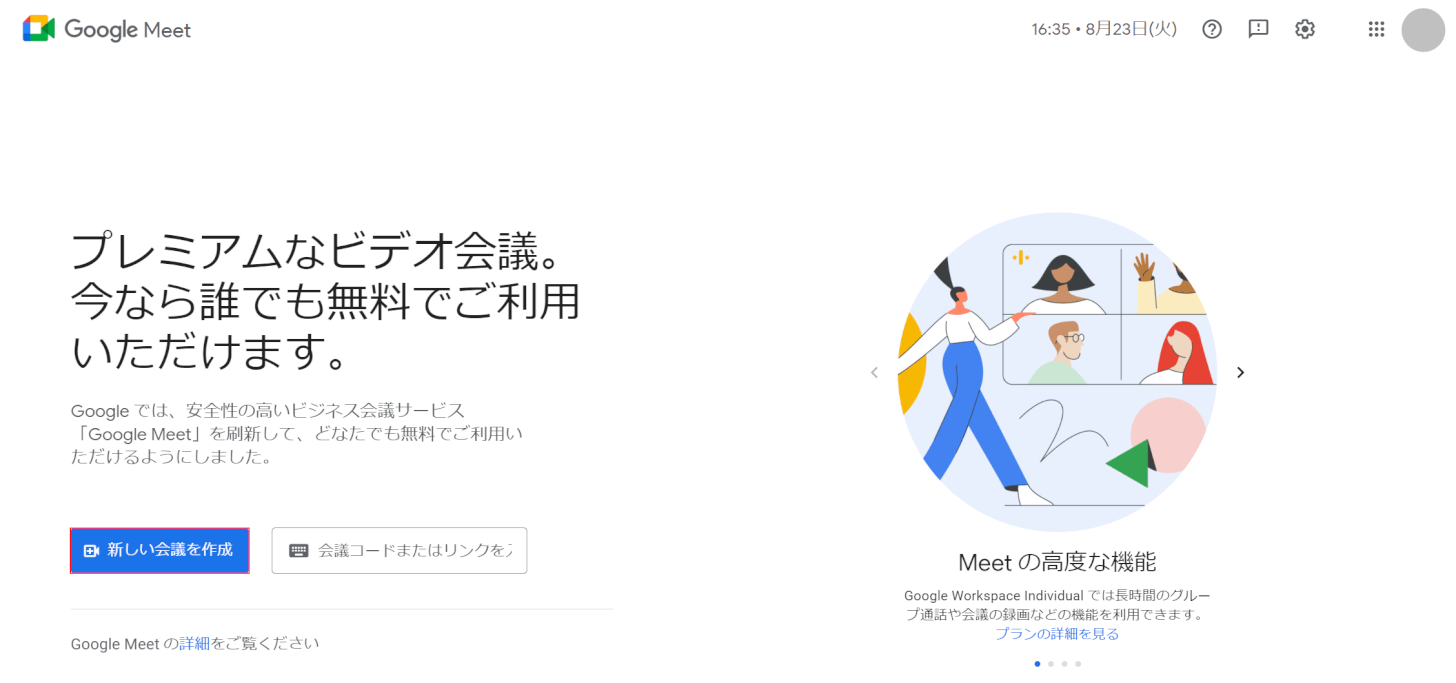
PCのブラウザ(Google Chrome)でGoogle Meetにアクセスし、新しい会議を作成ボタンを押します。
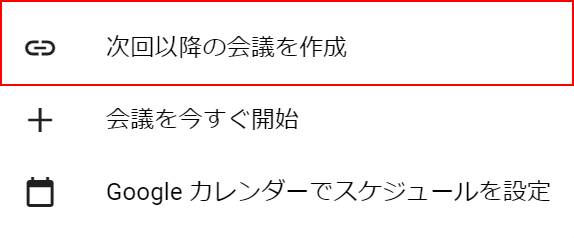
次回以降の会議を作成を選択します。
会議のURLが表示されますので、リンクをコピーボタンを押し、URLをコピーします。
次に、メール(例:Gmail)を開きます。作成ボタンを押します。
スマホの場合と異なり、定型文は無いので自分でメールの文章を作成します。①宛先のアドレス、②件名、③文章をそれぞれ入力します。④先ほどコピーしたURLのリンクをCtrl + Vで貼り付け、⑤送信ボタンを押します。

「メッセージを送信しました」のメッセージを確認し、メールが送信されたことを確認します。
こちらは相手のメールアドレスです。①受信トレイ、②新着メールの順に選択します。
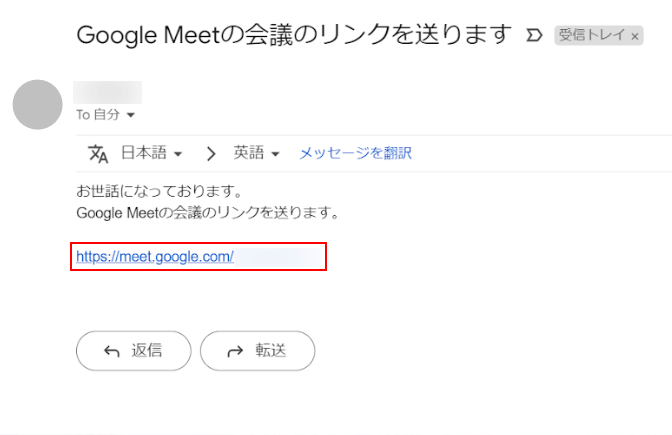
ホストからのメールのリンクを開きます。
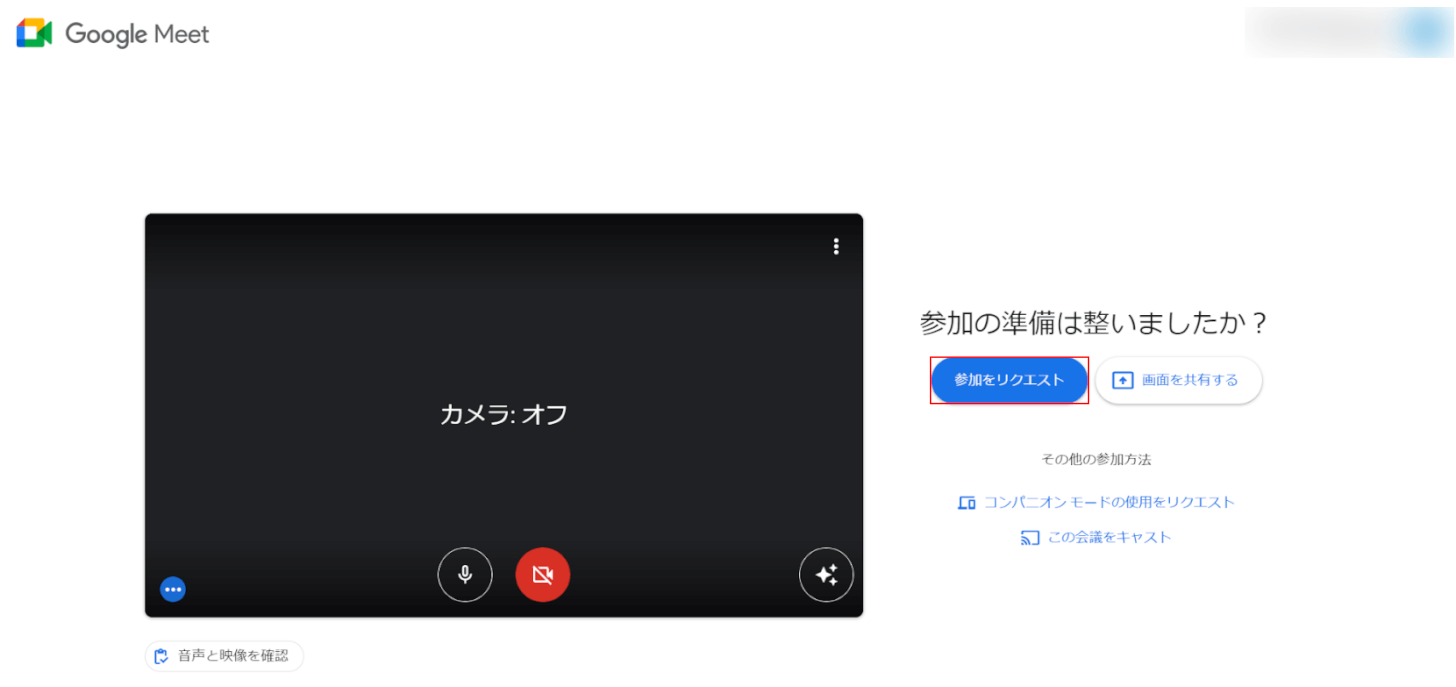
参加をリクエストボタンを押します。
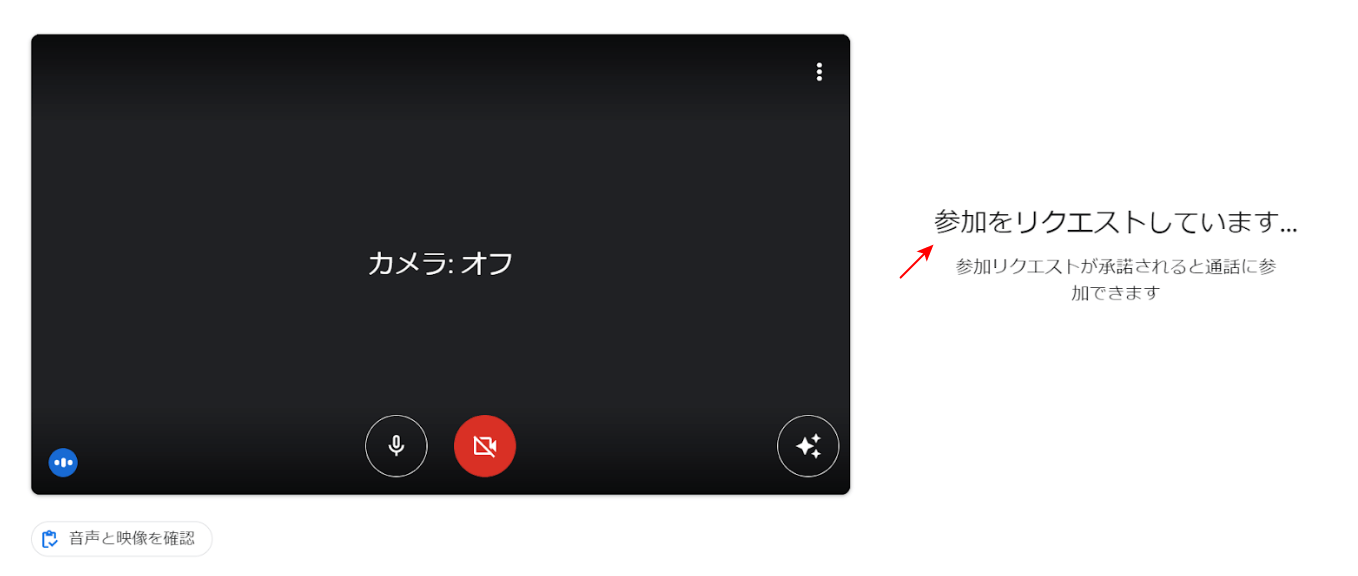
「参加をリクエストしています...」が表示されました。リンクを送ったホストの承認を待ちます。
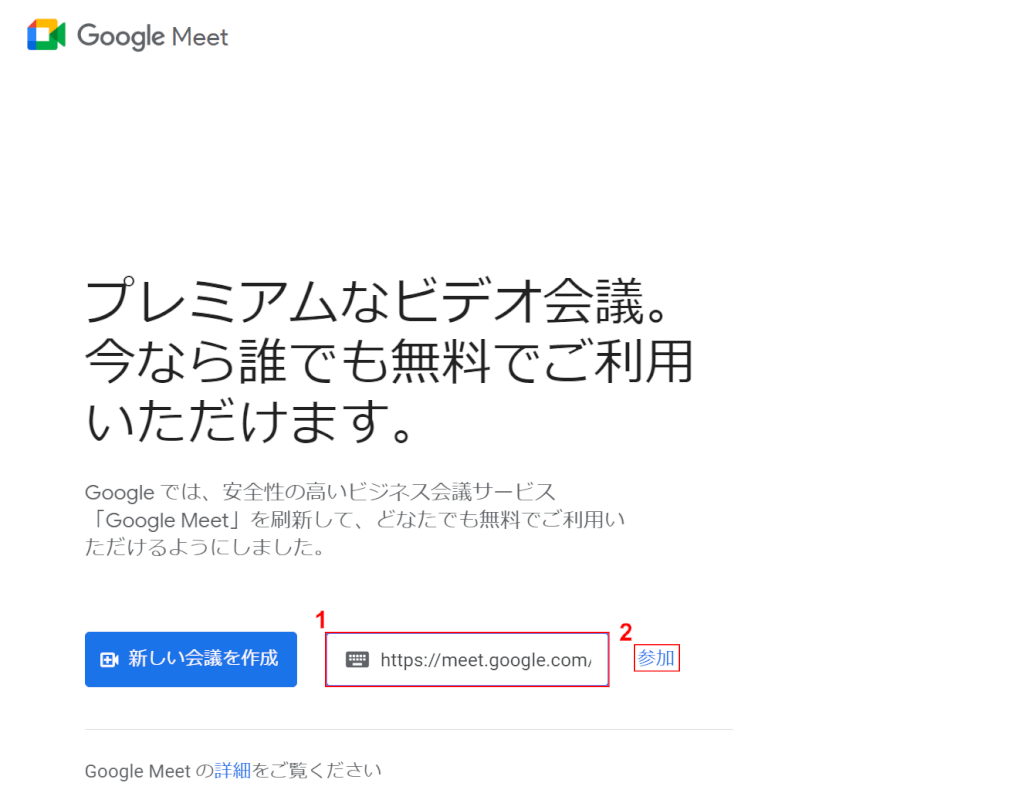
次に、自分が見ているPCで、Google Meetのトップページに戻ります。①先ほどコピーしたURLを貼り付け、②参加を押します。

今すぐ参加ボタンを押します。
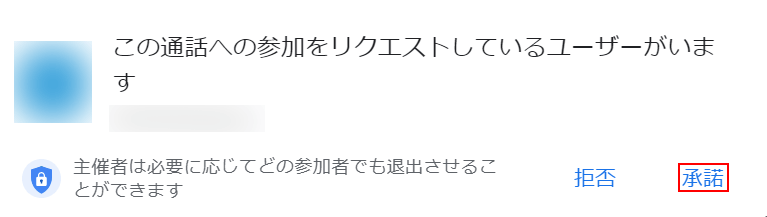
「この通話への参加をリクエストしているユーザーがいます」画面が表示されました。承諾を押します。
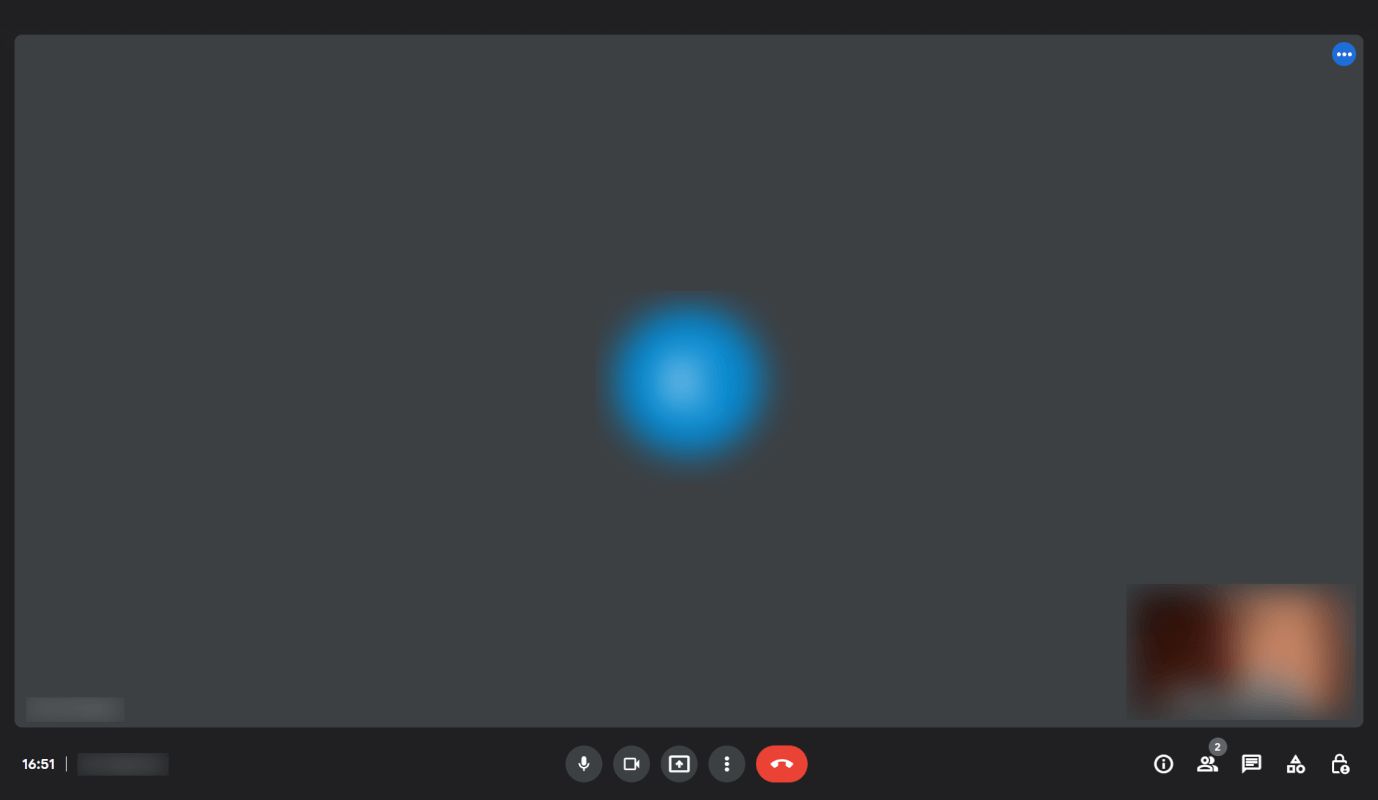
会議(通話)を開始することができました。
スマホ(iPhone)の場合
Google Meetの会議の作り方に関しては、以下のとおりです。

iPhoneを開き、Google Meetアプリを選択します。
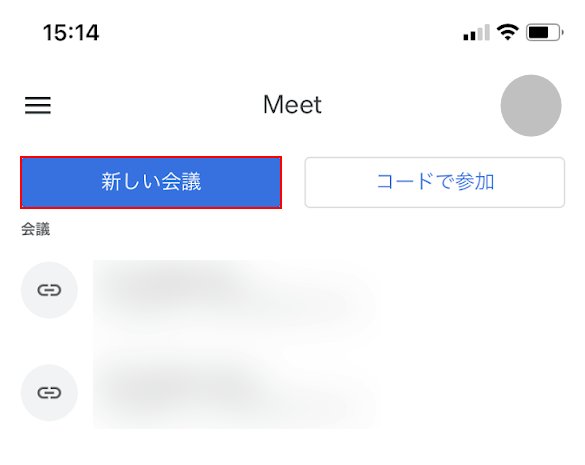
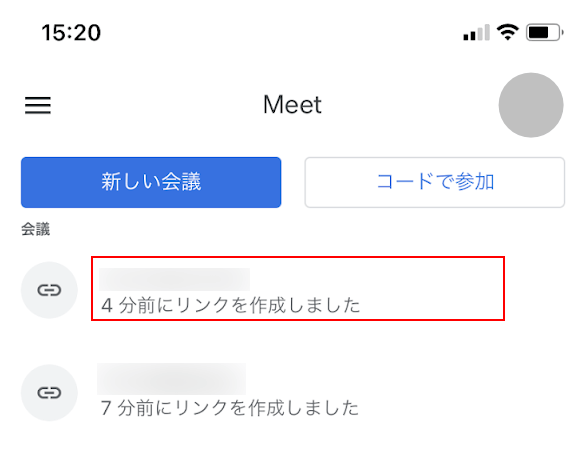
新しい会議ボタンを押します。
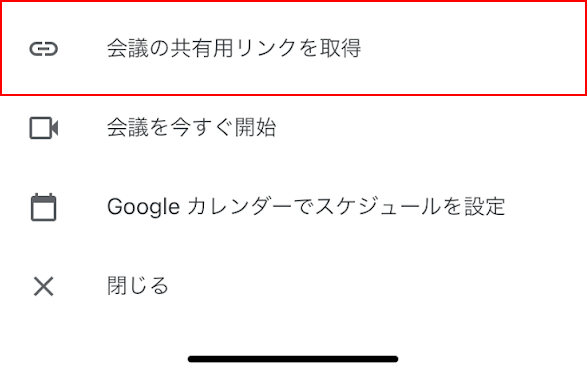
会議の共有用リンクを取得を選択します。
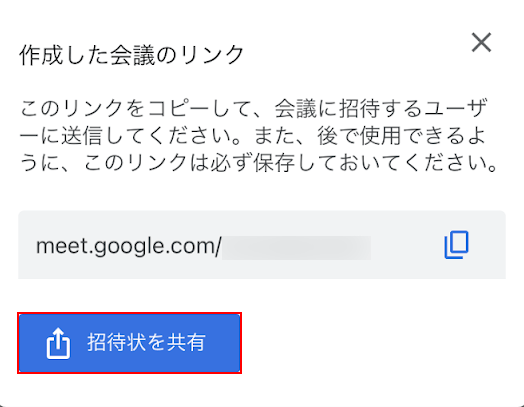
招待状を共有ボタンをタップします。
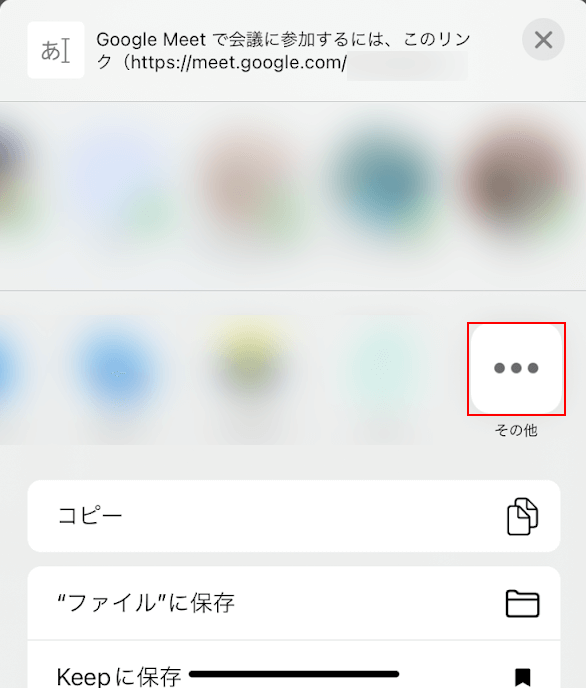
ここでは、Gmailを持っている相手に送りたいので、... その他を選択します。
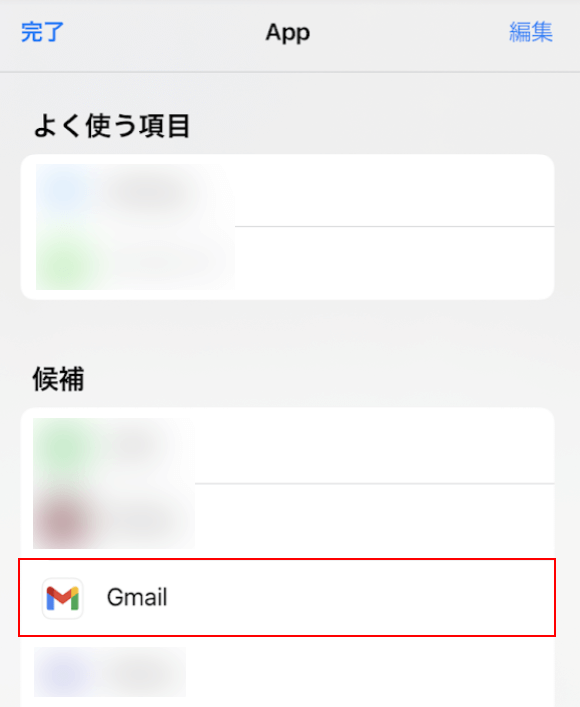
Gmailを選択します。

Gmailを開くと、すでに文章(URL含む定型文)が入力されていました。①相手のメールアドレスを入力します。②送信をタップします。
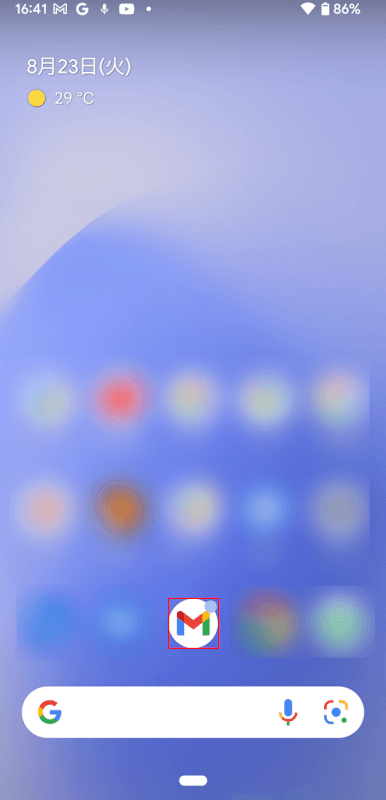
相手のスマホで、Gmailアプリを選択します。
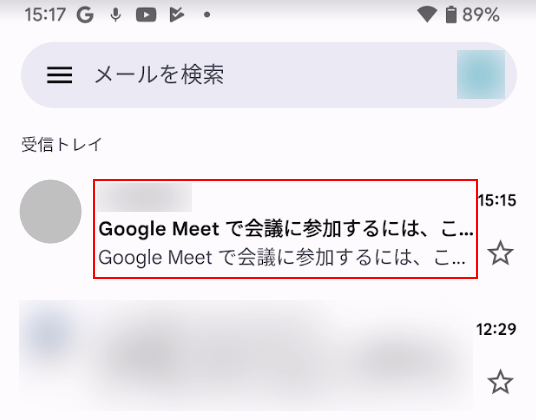
新着メールを選択します。
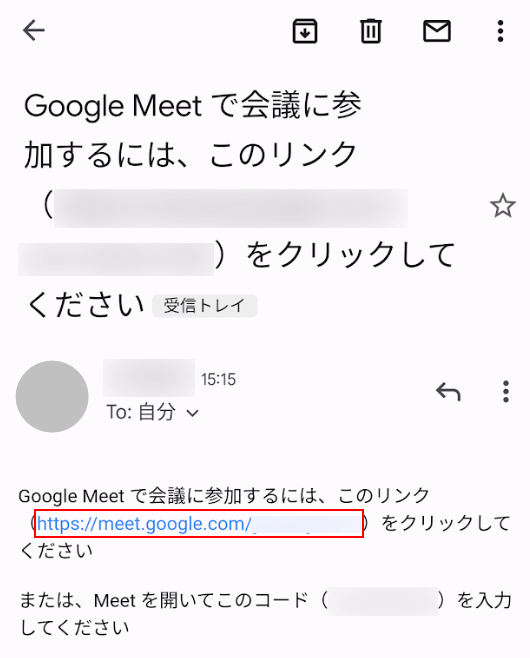
Google Meetのリンクをタップします。

参加をリクエストボタンをタップします。
自分のiPhoneを見てみましょう。先ほどGmailで共有した会議のURLを選択します。
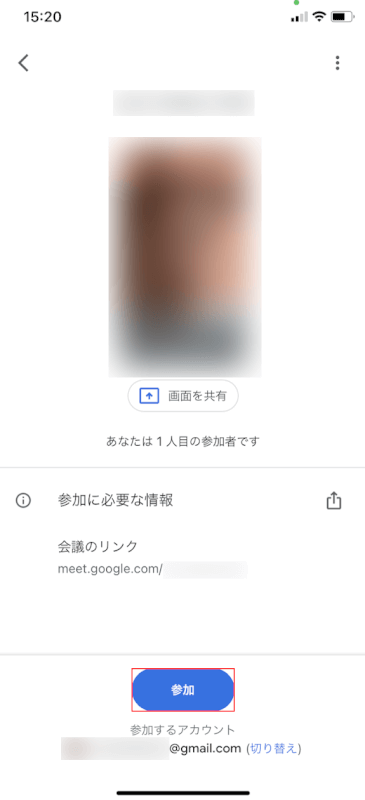
参加ボタンをタップします。
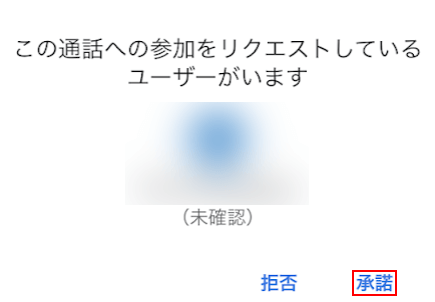
「この通話への参加をリクエストしているユーザーがいます」の画面が表示されました。承諾をタップします。
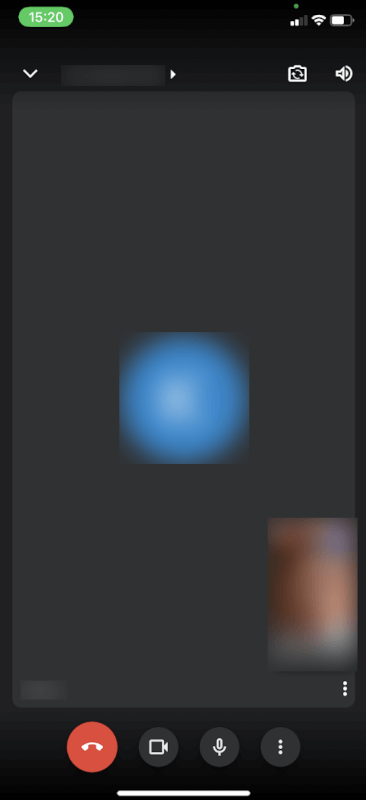
会議(通話)が可能になりました。